 05 59 93 10 52
 Write to us


Hanging a hammock is quite an art. You can completely miss out on the comfort it can offer if your setup isn’t correct. The golden rule is that it should have a nice curve (a beautiful arc) to provide a flexible lying surface, allowing you to lie on your back as well as on your side diagonally, while also having head and arm support.
Let's go through all the installation secrets in detail.
The ideal distance between two attachment points.
You must not hang a hammock under any circumstances.. One will be forced to settle there only on their back, and the bedding will be stiff.
The basic rules for installing a hammock:
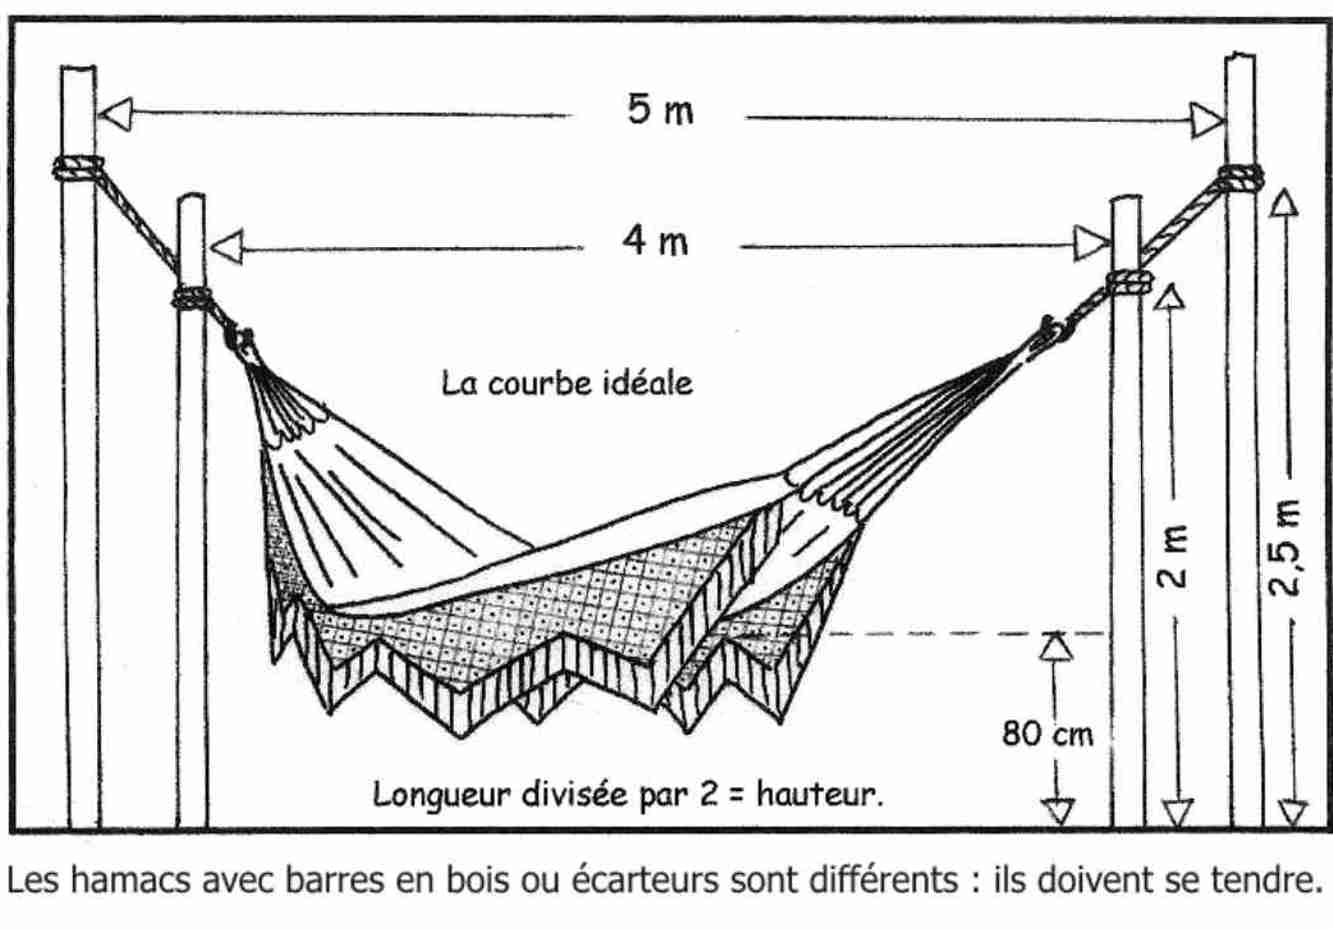
Let's do like the house builders in countries where the hammock serves as an everyday bed. According to their plans (bedrooms, living room, verandas), they seal fixtures into the walls before they are finished. The rule is: The length divided by two = the hanging height.
If you have two walls 4 meters apart, you will place your fixture at a height of 2 meters. Then you will make a connection from the fixture to the hammock handle using a rope and a hook. See all our available items in our department.Hammock mounts.
This mathematical rule will give the ideal curvature. However, in Latin America, some people prefer a hammock if it is much more curved. This means that if you have 4 meters but it would be much easier to use your ceiling beams that are 2.4 meters high, go ahead! It will still be a very comfortable setup.
And indoors: why not?!
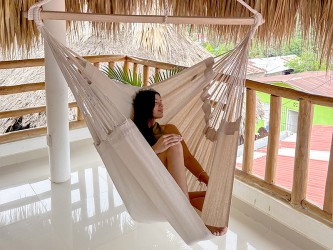
In France, when you think of a hammock, you mostly think of relaxing in the garden. What a shame, we miss out on using it all year round! At my place in the Landes, I have them both indoors and outdoors. I use the indoor ones more often. It’s there, arms wide open, so hop, 5 minutes or an hour, a quick nap or a few hours of reading, a cuddle with my sweetheart—there’s no set time to relax.
In Latin America, we are under the tropics, it is hot, and people tend to avoid the sun. You can find hammocks in the bedrooms and under covered terraces, well in the shade.
In a teenager's room, it's excellent. They spend a lot of time there. It's a good space to enhance for them. The hammock will be beneficial for studying. It has been proven to improve concentration. When a friend comes to sleep over, it serves as an additional successful sleeping spot! This item takes up very little space except when it is set up. When folded along its wall mount (see sketch), it completely disappears.
In an adult bedroom! In Latin America, couples very often have a bed and one or two hammocks in their bedroom. The hammock is used as an everyday bed when it’s very hot. We won’t sleep in a hammock every night, but I recommend it in case of physical problems. Overwork, occasional back pain, extreme fatigue. Spending a few nights in a hammock in these cases often helps to recover. Personally, when work exhausts me, when I’m very tired, have back pain, and am on the verge of a lumbago, a few nights in a hammock and everything is fine. It’s my sweetheart who isn’t happy…! Except when we spend sweet, tender, intimate, and naughty moments there…
If you have the possibility, install it indoors, you won't regret it!
How do you install it on walls, beams, or the ceiling?
What are my walls made of? Plasterboard is easy to recognize. For the rest, you need to take the smallest concrete drill bit you have and make a small hole where the hammock fixture will be placed. If it’s a hollow material and the dust that comes out is red, then you are dealing with a hollow red brick wall. If the dust is gray, then it’s hollow cinder block. Based on this, here are the different fastening methods:
Hollow red brick wall:
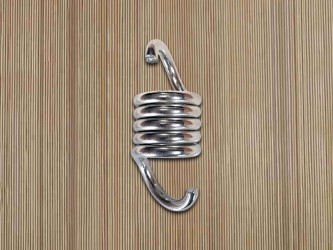
A single hole the diameter of the chemical anchoring sleeve, fill the brick with the chemical anchoring (available at large DIY stores), immediately insert a gym hook into the sleeve. Wait for the anchoring to set completely. Attach the hammock with a set of ropes and hooks, from the gym hook to the hammock handle.
Hollow concrete block wall:
Use our universal mounting kit. 4 holes of 10 mm diameter. Everything is provided in the kit: the anchors, screws, rope, and hooks to adjust the hammock.
Solid concrete wall or ceiling:
Use our mounting bracket for concrete anchoring. 1 hole with a diameter of 15 mm. Then connect the hammock with a set of ropes and hooks. If you come to our store, we will gladly lend you a router that will make your DIY project easier and save you from having to buy a 15 mm concrete drill bit.
A partition wall made of plaster blocks, made of bricks:
Attach a wooden board measuring 40 x 40 cm, with a thickness of 6 to 10 cm, at its 4 corners onto your drywall. Avoid hitting a metal stud! Then fix our universal mounting kit in the center of the board. The wooden board will distribute the load over a wide area of the wall. If possible, do not attach the hammock to flat walls but rather in a corner (for load distribution). Drywall can support heavy loads. Kitchen installers hang kitchen cabinets on it! The secret is to distribute the load.
A drywall partition:
Fix a wooden beam measuring 10 x 15 cm from the floor to the ceiling. Attach it to the drywall using appropriate anchors approximately every 50 cm. Use our universal kit on the wooden beam. Avoid placing the hammock on opposite walls; instead, position it in a corner (to distribute the load).
Wooden wall or ceiling:
It's the easiest! The DIY won't take long to do. Use two wood screw studs, with a minimum wire diameter of 8 mm. Make a pilot hole with a diameter of 4 mm. Use a string and hook game to connect the handles. It’s very simple.
For all scenarios, our hooks are wide and allow you to insert both handles of the hammock onto a single hook so that you can fold the hammock along a wall.
Hanging in my garden.
I have trees, everything is fine. I will only need a kit with ropes and hooks. Follow the instructions or watch the hammock kit video. Then learn the grappling knot, which is explained with our kit. It is the simplest locking knot to make. Everyone can do it.

How do you hang it without trees?
You can choose a single anchor point on a wall of your house (see sketch). Then, on your lawn, install our Madera stand for the other side of the hammock. A simple and effective solution, but it does not allow for wide swinging in the hammock. Be careful with children.
A post in the garden?

It is possible to install one or two posts in your garden. You need to find a post that is 3 meters long, with a minimum diameter of 10 cm. Try checking with wood suppliers because the sizes offered in large DIY stores are often a maximum of 240 mm. Choose a post with the smallest knots possible, as it will be more durable.
In sandy soil, the easiest. Make a gaping hole 80 cm deep. Place your post in the center. Get two treated wooden boards approximately 60 cm x 20 cm x 3 cm. You will place them as follows: one at the bottom behind the post, the other in front at the top just below the surface of the ground. Refill with sand, that's all. There is no need to add cement. For the post to sink, it will need to pull along such a volume of sand that it becomes completely stuck.
In an earthen floor. Dig a hole 80 cm deep with the width of a spade. Place the post in the middle, wedge it with some stones to keep it firmly in position. Fill it with concrete almost up to ground level. Wait 3 days for the concrete to fully dry before taking your first naps.
For a post to be removable, you can set a pipe sleeve in the concrete. In this case, allow plenty of clearance because the wood swells in winter and your post could end up stuck permanently.
My advice comes from extensive experience. From around 1990 to 2000, I installed hammocks for many clients—probably about thirty posts per year! Until one day, a craftsman asked me, "Do you have a ten-year building insurance for the work?" Ouch, I sensed a problem coming... "If you make a hole in a wall and pierce a pipe, what will you do?" At your home, it is your liability insurance that will cover you in case of any mishap!
Gradually, due to the growing success of my store which left me less time for this kind of installations, I stopped offering this service.
How do I properly hang my hammock?
This item should always be sold with a good instruction manual. We started in 1988 and had to design and draw all our manuals ourselves. As for wine, this product is so deeply rooted in our culture that everyone knows how to consume the wine they buy. Regarding the hammock, it must be acknowledged that it is not part of our traditions. While this object has been around for millennia in Latin America, in the West we are complete novices on this subject, which holds many secrets. Many models are sold without any manuals at all! Very bad...Asian hammocksWhich will not only be poorly installed but whose fabric will loosen and whose arm ropes will become unbalanced. This will result in many cases in very poor use and discomfort. Even just the position to adopt in the hammock. Still too few of you know that you lie down along the diagonal. But progress is being made!
As far as I am concerned, I have three priority rules: the right curvature, simplicity, and safety.
Attach with the correct curvature.
You definitely do not stretch a hammock with the idea of being as flat as possible. It's quite the opposite. You curve it to be completely flat, but using the diagonal. As a result, you don't just sleep on your back. It is perfectly possible to sleep on your side if it is properly set up.

What is the rule to follow to give the correct curvature? A good example to follow (I didn’t invent anything because I have always drawn my knowledge from observing experts in Latin America) is that of house builders. In the states where hammocks are very common, when they have a bedroom on their plan, they will install hooks for hammocks in the walls before they are finished. There is 4 meters of length between the two fixtures and 2 meters in height from the ground. Here is the rule: length divided by 2 = height.
Among connoisseurs, there are also subtleties, and everyone has their preference regarding the curvature. One day, at a Brazilian's place, I saw an ultra-curved hammock. The measurements had to be 2 meters high by 3 meters long! And I asked him the following question: "Is this your everyday hammock? Curved to that extent?!" And he replied, "Ah, this is my favorite curve. This is how I like my hammock. I’m comfortable lying flat!"
We can bend it a little more compared to the basic mathematics, but we cannot stretch it further. When it is too tight, it is difficult to position ourselves along the diagonal. We force with our feet to open it without much success. In the end, we end up stuck, trapped inside.
Hook in a simple way.
A simple game of ropes and hooks, using only one knot. The grapnel knot (see drawing above) is the simplest and most effective one we have found. We have adopted it in all our accessories. It is self-locking, easy to tie, and to untie!!
Hang securely.
This is of paramount importance, as a fall can have serious consequences. We must ensure that our walls are solid (beware of poorly sealed stones that can come loose from their place). That our concrete posts are well "reinforced" (beware of clothesline poles that have no iron bars inside and can break in two without warning). That our wooden posts are at least 10 cm in diameter and do not have too many knots that weaken them, and that they are not rotten at their base from having spent too much time in the ground. That our DIY work has fully complied with all safety standards (screws compatible with anchors, etc.). That we have tied the knot in the rope properly. That we have tested everything thoroughly before telling our 5 children, "Ready to go!"
When it comes to installing a hammock chair, you need to be even more careful because a fall can have serious consequences. In this case, it is essential to buy a properly adapted mount that rotates 360°. This ensures that if a child plays by spinning in the chair, the mount will follow the movement.
If your rope simply goes around a wooden, concrete, or metal beam, regularly climb up to check the condition of the rope. Replace it if necessary.
The solution of the support or base in wood or metal.
There are cases, the hammock stand It will be preferable. In our temperate climate, there are seasons when we seek the sun and others when we avoid it. The support has the huge advantage of being usable in the shade or in the sun, as you wish!
At the bottom of the garden, the solution to the solitaire.
If your hammock is located between your trees at the very back of the garden and you have to cross the entire lawn before you can enjoy it, you won’t use it very often. It will become a lonely object and lose its social appeal. The hammock stand can be placed near the terrace, where everyone gathers. You step out of your house onto your terrace, barefoot, and voilà, a quick trip into the... hamac -> hammock ! !